
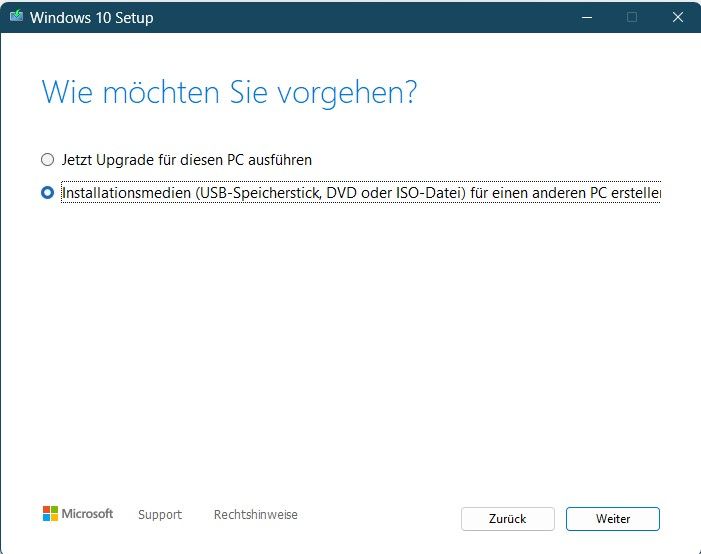
First we must create an ISO. For this there are exsiting many ways. The two most common one are the "MediaCreationTool", what is the easiest way to get on ISO but also the most limited one. To get a full custemized iso with the things you want you should use UUP DUMP.
Get an ISO
MediaCreationTool
The simplest way to get MediaCreationTool is from Microsoft.
After downloading you can start it accepts the lizenz and select that you want create an ISO:
Then select what you need in architecture language and edition.
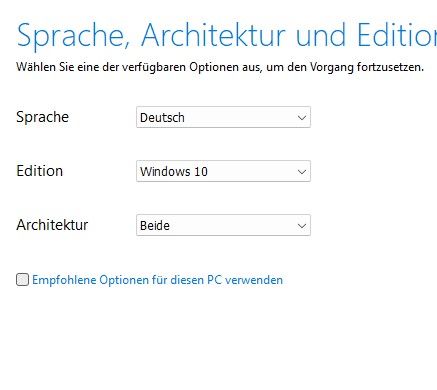
After that select you want to create an ISO. Then you can start the process.
This will take a long time. So take a coffee.
UUP DUMP
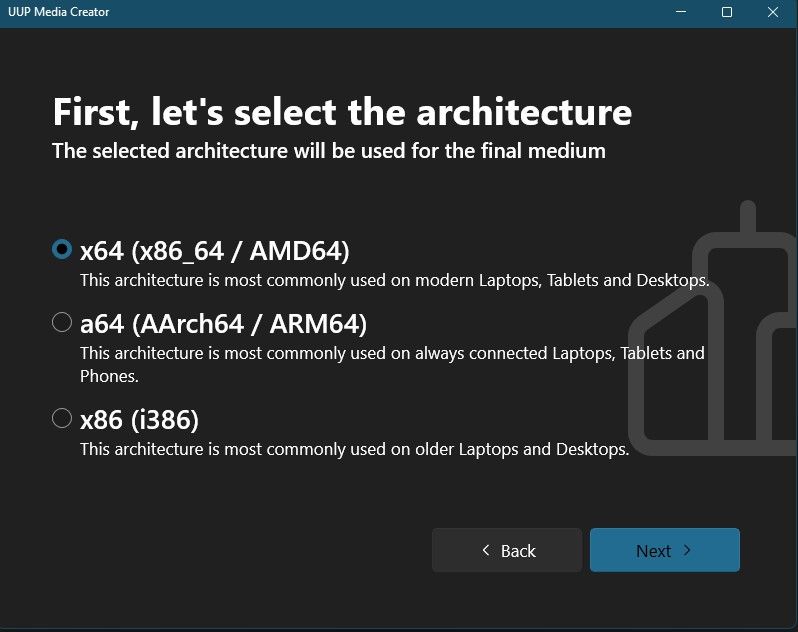
The simplest way to get an UUP DUMP is to download the UUP Media Creation Tool from the MS Store. The tool is relativly self describing and easy to use:
- First start it and select the target architecture for your portable windows:
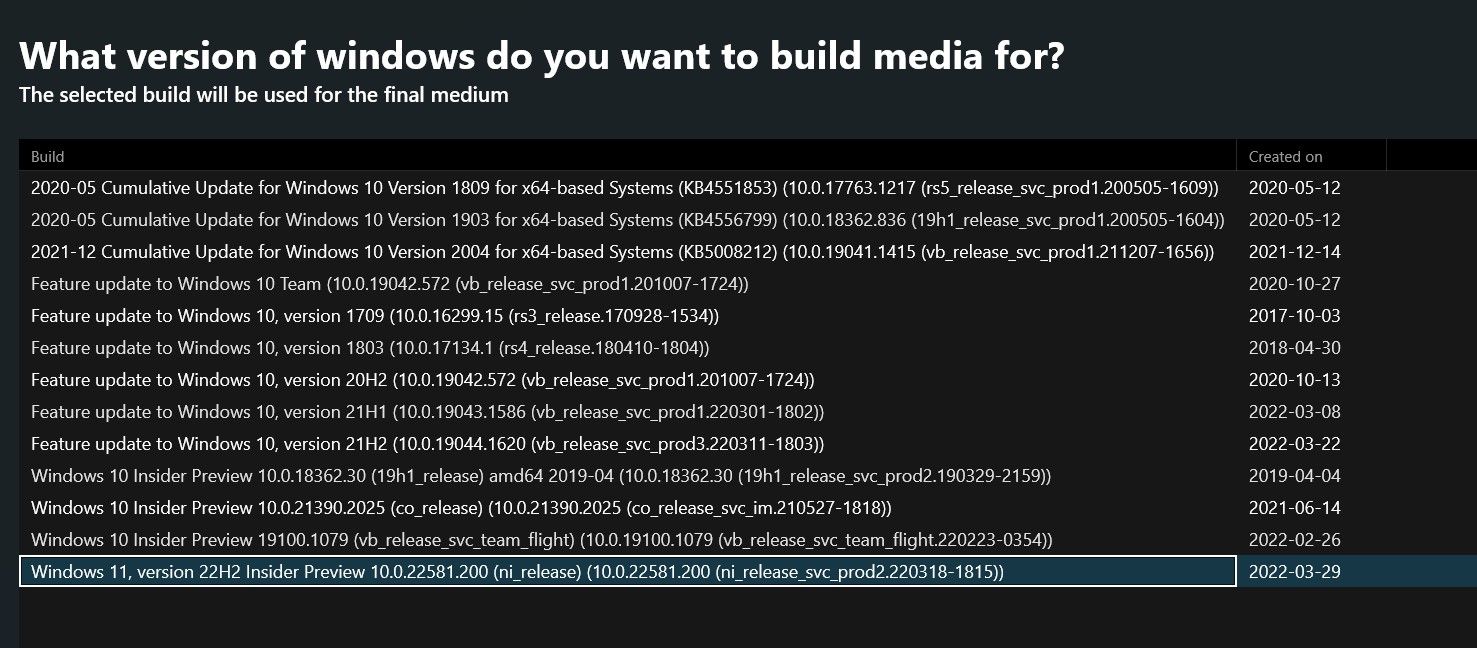
- Now you must select a build, it helps to just take the newest stable version you can see. (This screen can load for a relativly long time)
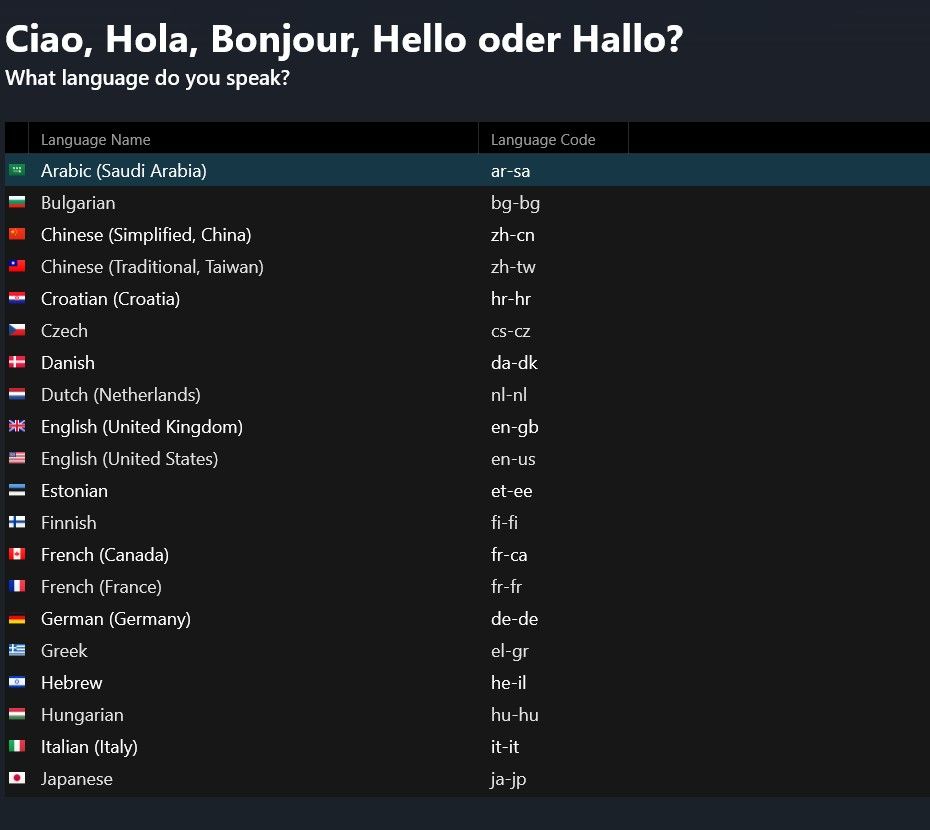
- Select your language
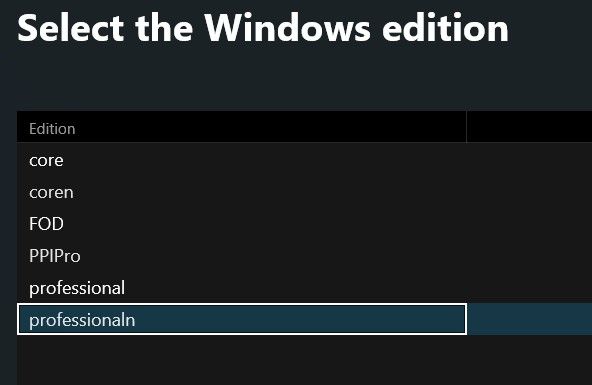
- Then you should select an SKU.
3. If you want the smallest image ever you should go for the "coren"
4. If you want all the admin tools and advanced tools you love you should go with "professionaln"
5. If you want to create a portable media player remove the "n" and you get all the media codecs etc. to your drive
- On the next screen you can select a compression type we leave it just at the default option
- Now you are at the summary page and must finally select a place to store your iso.
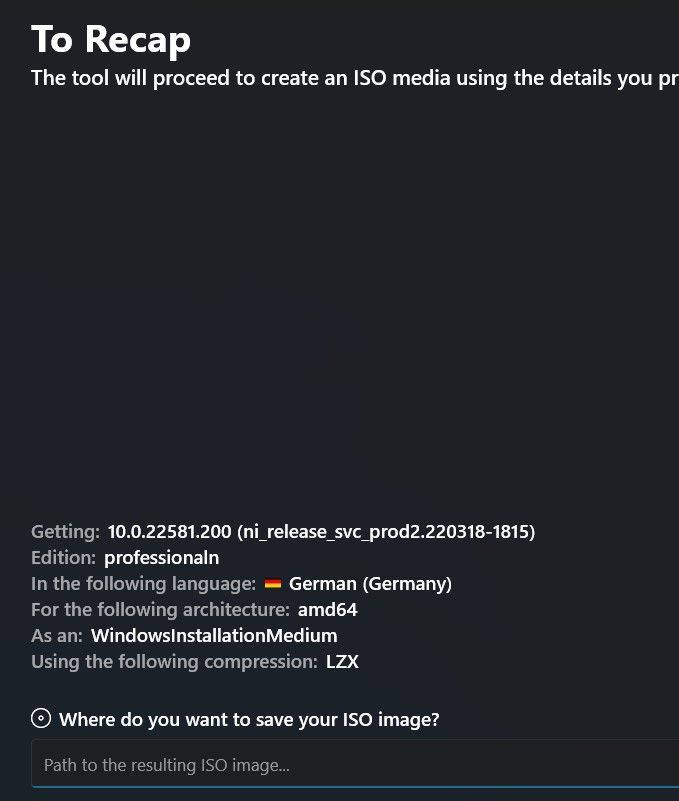
- If click now next it is time for a break. Came back in 30mins or more. Depends on your internet connection and your storage speed.
Prepare your drive
Warning: the following steps will erase your selected drive completly. There is no way back to recover your data from that device. So double check every step you do!
- Open a terminal with admin rights.
- In that terminal we start
diskpart - In disk part we will first search for our drive we want to use as portable windows drive. To see what drives are exsisting you can type
list disk. This should give you a list like the following:
- In my case the secound partition is what I want to use. the I type
select disk 1(because the counting start at 0, so secound is 1). Check for your self wich disk is the correct one. - Now we clean the selected disk. with just typing
clean - Now we have an empty disk we create one small and a big partition.
7. small partition
8.create partition primary size=500(creates 500MB partition)
9.select partition 1(select the partition)
10.format quick fs=ntfs(format it in ntfs)
11.active(mark the partition as bootable)
12.assign letter=r(set a drive letter so we can interact with the partition later)
13. technically the small partition is only needed if you still want to use an bios and not an uefi.
12. main partition
13.create partition primary(create a partition that is as big as the rest of the drive)
14.select partition 2(select the partition 2)
15.format quick fs=ntfs(format it in ntfs)
16.assign letter=d(set a drive letter so we can interact with the partition later)
That's it. ouer drive is now prepared. To double check your drive should now look like that:
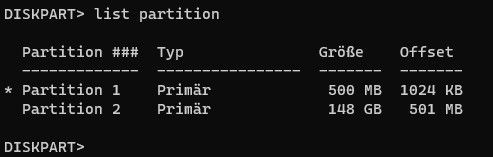
Note: the star (*) is important!
Install Windows
Now we can start with the installation. First we must mount the iso created in step 1. If you use any windows that is newer or equals Win8 you can just double click to mount it. If you use an odler windows you will found virtual disk mounting software in the internet. After mounting remember the drive letter of the ISO. The following steps will revering to it as "ISO disk"
Choose an edition
In an ISO disk image could be many windows versions integrated. So we must select one.
Note: There are also two different container formats for the image container so just be aware that commands that are trying to interact with files that end with
esdcould be in your case end withwim.
First search in the mounted iso for a file that is called install.[esd|wim]. The simplest way to do it is with an powershell by typing the following:
Get-ChildItem E:\ -Include "*install.wim", "*install.esd" -Recurse
Note:
Eis the mounting point of my "ISO disk"
It should result in the following table:
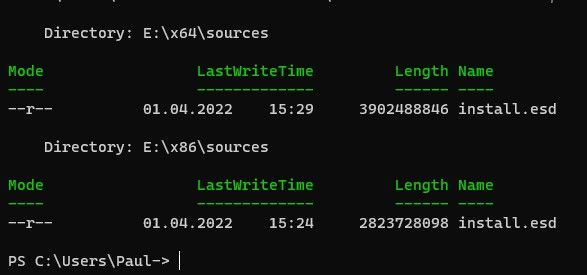
For my image you see I have two .esd files. One for x86 and one for x64. Because the PCs I want to use with my portable windows are x64 I choose that path: E:\x64\sources\install.esd
Now we have our file of intrest. From now on we need an terminal with privilege access. So open an admin terminal. (fastest way is: WIN + X A) In this terminal we run the following line:
dism /Get-WimInfo /WimFile:E:\x64\sources\install.esd
You will see now a list with all SKUs that are in your disk image.
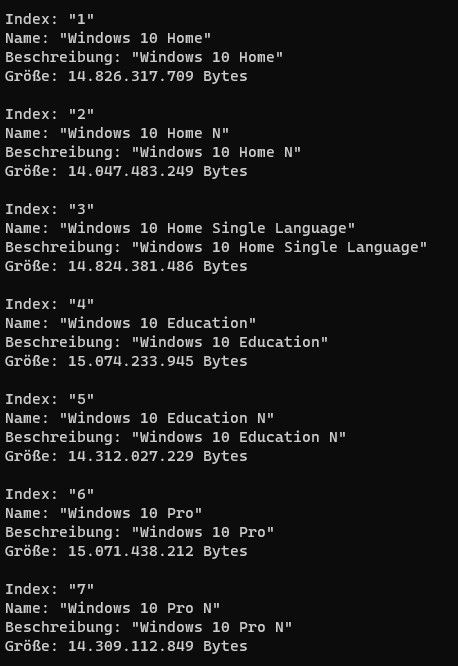
Choose one and use the index in the next command.
Install Windows
The following command will install windows to your main partition of your portable drive. So D is here my big / secound partition. And I install Windows 10 Pro because I choose the index 6.
dism /Apply-Image /ImageFile:E:\x64\sources\install.esd /index:6 /ApplyDir:D:\
This command will take a while. mainly depending on the speed of your portable drive. After the first 5 to 10 mins you will see a progressbar.
Make it bootable
After we did install Windows we must create a boot entry too. This is realtivaly easy possible with the following command:
D:\Windows\System32\bcdboot D:\Windows /s r: /f ALL
This command takes from your new portable windows drive the command bcdboot and create for your Windows installation (D:\Windows) on the drive /s r: (this is the small partition we created earlier) a boot entry that can be readed by an BIOS and an UEFI. (/f ALL)
Boot it up
After that you can unplug your portable windows drive and plug it in another device you want to test your portable windows with. The start this other device and open the boot menu. (for the most motherboards this is F11) Then select your USB device for boot and it should boot. The first boot takes long and also includes a reboot for diffrent driver adjustments.
Note: after reboot you must reopen your boot menu again, because propertly your USB drive isn't the main boot device.
After this first reboot you should be in the OOBE Setup and can create your user account and so on.
Have fun with your portable device.